
Timetable
Timetable Management – Step-by-Step Guide
2 min read
8 views
Esha
May 30, 2026
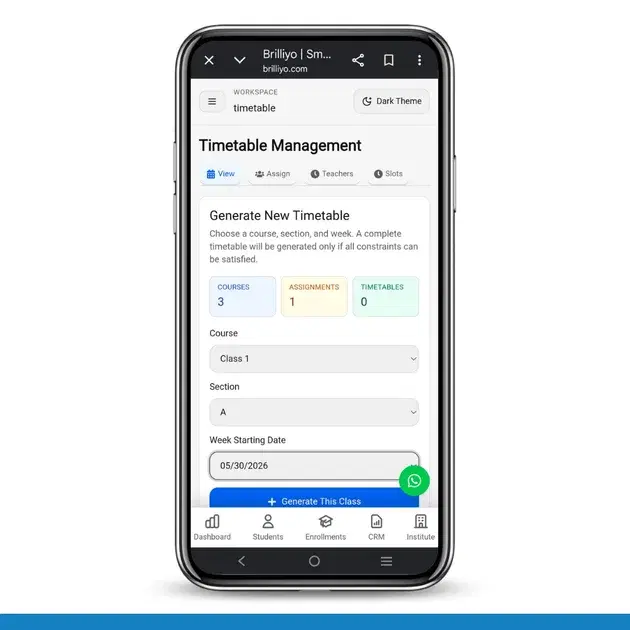
Timetable Management – Step-by-Step Guide
The Timetable Management feature in Brilliyo helps schools and institutes create and manage class timetables efficiently.
Step 1: Open Timetable Management
- Go to the Dashboard.
- Click on Timetable from the menu.
- Open Timetable Management.
Step 2: Create Subject-Teacher Assignments
Before generating a timetable, assign subjects to teachers.
- Open the Assignments tab.
- Select the Course.
- Select the Section.
- Select the Subject.
- Select the Teacher.
- Enter Periods Per Week.
- Enter Max Periods Per Day.
- Click Create Assignment.
The assignment will be added to the Existing Assignments list.
Step 3: Configure Teacher Availability
- Open the Teacher Availability tab.
- Select the teacher.
- Configure available days and time windows.
- Click Save or Update.
This helps prevent scheduling conflicts during timetable generation.
Step 4: Create Time Slots
- Open the Time Slots tab.
- Click Add Single Slot or Bulk Create.
- Select the day.
- Enter the slot number.
- Set the start and end time.
- Save the time slot.
Create all required periods for the week before generating the timetable.
Step 5: Generate Timetable
- Select the Course.
- Select the Section.
- Choose the Week Starting Date.
- Click Generate This Class to create a timetable for a specific class.
OR
- Click Generate All Classes For Week to generate timetables for all classes.
Step 6: View and Manage Timetables
- Generated timetables will appear in Latest Created Timetables.
- Open any timetable to preview or edit it.
- Make changes if required and save the timetable.
Benefits of Timetable Management
- Automatic timetable generation
- Better teacher schedule management
- Reduced timetable conflicts
- Easy class planning
- Time-saving timetable creation
Tags:
BrilliyoTimetable ManagementSchool TimetableClass SchedulingTeacher Management
Share: